Descriptions:
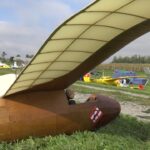
XFly-Model Tasman 1500mm STOL | UNBOX, ASSEMBLY, Radio & CG SETTINGS (English/Français) 4K
Beschreibung zum Video:
Hi folks ??
Thanks a lot for watching and please subscribe to support the channel ???
Merci d’avoir regardé cette vidéo et n’hésitez pas à vous abonner ???
✈️ ?? XFly-Model 1.5m Tasman PNP
Wingspan 1500mm, long 1150mm, 1550gr empty, With HRB 4S 2200mah 1785gr, Zippy 4S 2700mah or Admiral 4S 3000mah 1850gr
Wing load: 50g/dm2
3536 900Kv Outrunner Brushless Motor (ESC 40A)
11×7 2 Blades Propeller
9g Digital Servo x6
Jeti REX7 Assist
Book CG 60mm
Rates (low are my low/mid are book’s low/ high are book’s high):
– Ailerons and elevator (measured outer trailing edge) : 10/15/25mm
– Rudder measured at the base: 10/20/30mm
– Flaps: 20mm (1mm down elevator) / 40mm (2mm down elevator)
Thanks for watching and if you like my videos please like & subscribe ❤️ (it’s free héhé ?)
Follow me on Instagram :
#stol #xfly #rcplane
Freitag – Newsletter, jetzt anmelden!
Vollständiger Text aus dem Video: XFly-Model Tasman 1500mm STOL | UNBOX, ASSEMBLY, Radio & CG SETTINGS (English/Français) 4K
Hinweis: Text aus der automatischen Spracherkennung aus dem Video ist allgemein bekannt ungenau!
[Music] [Music] um so guys um this is today the unboxing video and assemble of the x flight model test man 1.5 meter short takeoff and landing this is a 4s plane and you can fit inside a 2200 to 33 100 milliamps all depends on the the weight of your battery to reach the cg 60 millimeters first thing first we will check the spec of that plane so as i said the wingspan 1.5 meters 1.1 meters long and the flight weight around 1.8 kilograms inside there is an esc 40 40 amps and the cg is at 60 millimeters digital servos 9 grams digital servos six servos some lights wingtip lights and this is a five channels throttle aerons flap elevator and rudder and around um [Music] 20 minutes of build time the specification specifically specifically [Music] m let’s get it started [Music] all right so we’ll need my hobby knife 12 blade 11 by 7 the spinner and no scone no this is just a nose cone and the spinner yeah all right ah the landing gear let’s have a look at the wheels oh nice all right so i’m on the rugged inflatables tires with this type of a air pump i think maybe we could try right now if it works yes it works oh yeah it works pretty good i’ve got around four psi excellent monthly all right so we are at okay 0.2 almost nothing very small pressure inside because yes there are nothing just a bit all we will see during the maiden flight so landing gear i think i will assemble that gear first and we have plastic plastic support for the gear some y y wires for the flap and the air runs i guess push rod for the rudder another hungary we have a the tool to to inflate the tires the camera and uh so the screws and the r clips on the lipstick clips for medley obama and some velcro on how to scratch come to draw the wingspar now we have the book manual instructions so let’s continue the stub there is the horizontal stabilizer very nice finish really really clean foam finish as usual with a with a x-fly foreign stickers to protect the the leaning edge plastic support super plastic the wings nice really nice it’s all already mounted pretty cool the lead the nine grams digital servos bowling’s already attached to what we want is fly not build [Laughter] so perfect finish it’s uh it’s a white foam it’s not painted it’s lighter when the the white foam is not painted we we can save some some weight of course all right one wing the second wing is perfect as well yeah pretty nice really cool so the flap and you see that um the lrons is in the same plug as a led light [Music] it’s really light it’s a vash monitor all right uh so here we go again so as you can see the screws there is only one shorter this is for the nose cone and i couldn’t this let’s assemble that main gear so easy nothing to do put that in place this is a mounting plastic part so you will need a x driver two millimeters and we see uh in clear length it’s really uh really stiff and and tough when i screw i can feel it it’s metal screw mounting perfect so that’s done wings with the spar the wings bar into the slots of the fuselage ah that’s better yeah great so we’ll open the the hatch all right easy a lot of room inside you see if i’m on the place the elevator and the rudder servos are there nice and this is an ec3 but i will put an adapter you see easy don’t want to solder some uh xt uh xt60 which point one bts suddenly the sixties all right great so we will put some some black tape around nice the sc is right here on the so i will need my y wire for the flaps and for the runs too all right perfect that’s in there are clips yeah good i’m in but i can’t see anything ah good great girl great all right the second wing it’s really easy to to put the wire in the hole and then you can grab it just behind no big deal perfect yeah great nice this one is okay too now we’ll put the hard clips but it’s very hard for me to to see uh what i’m doing because i have my iphone just in front of my eyes foreign all right perfect that’s done now we’ll have to make to screw the wings oh obviously there i now understand why why they they said to [Music] to put the plane upside down i think it will be easier with the plane upside down me perfect wing done so that’s done now the horizontal stabilizer let’s assemble the horizontal stabilizer there is a plastic pin and it’s perfect the same screws same as the wings and the main ending we got one uh one screw uh one spare screw never over tight it’s perfect so the servo of the rudder is already mounted and now we have to to put that linkage but first i will plug my receiver so let’s do the radio assembly so this is the lrons and the lights so we will connect with the y wire and clearly this year okay outfit if you see a short flap wire coming from the wing just plug the y wire before putting the the wing in the fuselage the branches so let’s have a look okay so it’s that wire the flaps will go over there now it will be easier this is it great perfect so let’s screw the wing perfect great so now we want to plug our receiver first is throttle where is it over there coming from the floor this is the throttle so again we have aerons so the one without anything then we have flaps rudder five and the elevator six so this is a an assist jetty assist receiver so it means that there is a gyro inside all my planes uh have some stabilized receiver so i will put it like that we’ll see later but the best way for a gyro is under the cg so we will put it like that just for the moment and we will plug a battery an hrb for example 4s lights [Applause] so flaps are reversed great air runs are reversed also now the receiver is um in the back of the of the tray now this cartridge receptor i’ve done my uh raids for the other rounds for the rudder and the flaps so the book calls for a 15 millimeters for the air runs and elevator for the low and 25 for the high and i’ve made a third one as usual with my own low which are 10 millimeters instead of 15 and for the rudder i’ve done 10 20 and 30 millimeters if you come down [Music] [Music] so we will have a look after for the [Music] elevator compensation with the flaps and we will adjust that in the air so uh let’s have a look you see the the air runs this is 10 millimeters this is uh 15 millimeters the low from the book and the high 25 for the flaps 20 millimeters for the first the first notch and 40 millimeters so it’s quite uh it’s quite impressive you see all the lending well not that much it’s 45 degrees seconds on the great angle of it so next in here with a big delay you see five seconds five seconds of uh to deploy them five seconds and to to go up it’s only three seconds uh the rather the rather i’ve got ten 10 20 and third and more that more than 30 it’s 100. 100 persons to do some knife knife edges so now we will have a look at the the elevator so the servo is perfectly centered on [Music] so they say to put the elevator on the first the first hole right and so the the the elevator has to be flush like that so is it good no it’s not i will have to unscrew for the device a bit more maybe one a half yeah looks good let’s see jorah exists all right so that’s good yeah it’s in and it’s perfectly straight so now let’s measure so i said ten so profounder cosmetics yeah almost yeah around 40 percent yeah i think it should be maybe 45 45 and it will give us yeah 10 millimeters good for my low the low from the book normally put it back on you can see minima 15 millimeters for the low perfect so it gives me sixty percent and the high this is 25 millimeters and so i mean one sec millimeter perfect so this is one hundred some percent polygons all right so 100 100 percent great and now the compensation let’s have a look all right so the compensation is okay now so let’s have a look i’m now full flaps and i’m at 7 75 millimeters and now am i i’m 77 millimeters so two millimeters of down elevator yeah i got two millimeters of down elevator full flaps so we will see pretty good so the radio setup is now okay what do we have to do now a throttle calibration so if you have a look at this page 12 you can see the instructions let’s do the throttle calibration so unplug the plane battery i’ve got my transmitter on the a throttle cut is off without the blades so nice the down stick down perfect the esc is calibrated so let’s have a look i got no no prop yeah perfect awesome throttle cut nothing great so it’s almost ready to fly because we have to balance we have to balance the prop not so let’s do this you can find this uh this tool everywhere just to balance a prop so we put that in and we observe it looks pretty nice let’s have a look it looks it look it looks balanced a bit heavier on this side maybe we’ll see on this side now we will see if it’s uh well it’s balanced i’ve never seen that in a in a formal plane in a chinese a chinese plane a balance prop out of the box so that’s good we can assemble the the prop and the spinner i don’t know that’s only this be sure to uh to unplug the the plane battery the plane lipo we we can take the small uh the small screw so first this then a blade so the blade with uh this side against the the wrench orange part the thing you can screw it with a smaller small driver good and then the nose cone this is the same same x driver so you see that and the the assembly is very uh very easy not over tight but josie is the plastic so that’s good this is it so now we will check the cg just to have a look with a 2200 the weight is 230 grams do some transcendence we’ll put that it’s a a really uh really light battery so i think we will have to put around there let’s check it out oh there is a shopper so i’ve made my marks and the 60 millimeters is right there you see right here so you measure from the leading edge i’ve done some some small holes so i now i’m at 60. i’m here at 60 that’s what i thought yeah so here is 60 uh 70 millimeters right there for 300 grams and 230 grams i will try again to be sure to all right so now i should be because 70 70 is uh right there 70 is the end of the plastic part non quest for some and so the plastic is here yes that’s it yeah yeah it’s it’s more like 70. um scratch yes yes that’s it all right 60 now so uh for a battery of 235 grams or 300 grams the placement are the same this is the same placement all right so uh that’s perfect can’t wait now to uh to to fly this uh this test man i hope the weather will be uh will be fine next days so just to for you to to see when i film my building video i’ve got that on my head this is on my uh on my head and the the iphone is right there in in this uh this mount and it’s filming just in front of my uh in front of my eyes so it’s very it’s heavy first it’s heavy and it’s very uh very disturbing for me to see i know if you have a question it looks very very nice in uh in rio the tasman 1.5 meters thank you so much uh rc castle and uh turbine rc.com or uh for this uh this uh beautiful uh shop takeoff and landing plane see you soon guys for the maiden flight and as usual don’t forget to subscribe put a thumbs up and tell me uh in the comment section what you what you think about 1000 subscribers i will do a giveaway so uh please share share my my channel to to reach that uh that’s 1 000 subscribers guys see you soon thank you so much have a good one bye [Music] [Music] you
Für den Inhalt des Videos ist der VideoCreator: Arthur RC verantwortlich.
#XFlyModel #Tasman #1500mm #STOL #UNBOX #ASSEMBLY #Radio #SETTINGS #EnglishFrançais
arthur rc, source